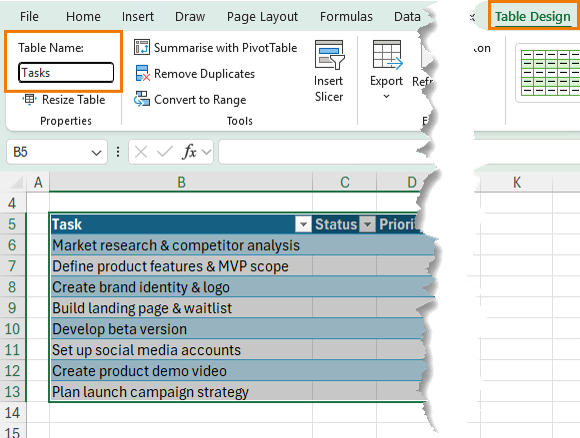
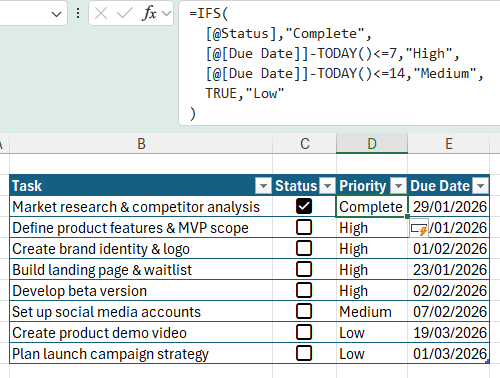
• Copies down instantly because it's inside a Table
The table's structured references used in the formula e.g. [@Status] make the formula easier to read and maintain.
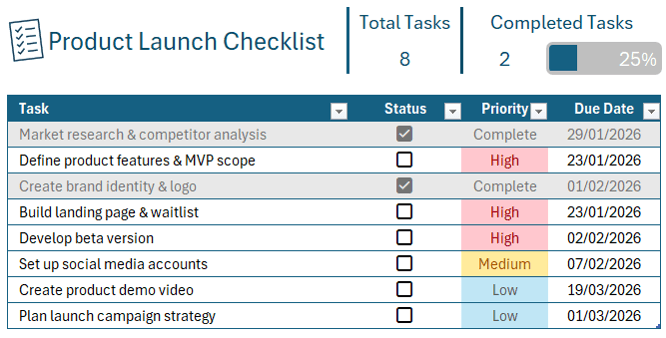
Step 3: Add Visual Completion and Priority Effects
Now you'll use Conditional Formatting to make the checklist visually intuitive.
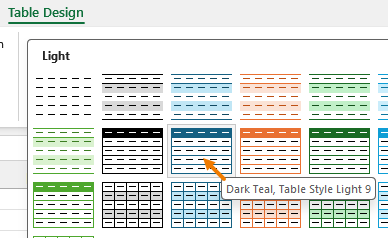
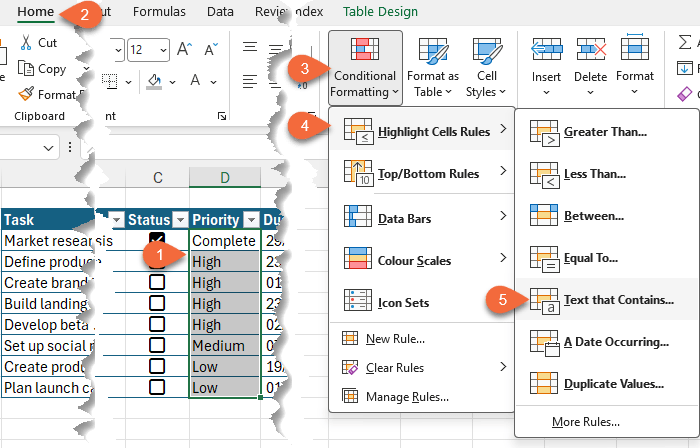
Highlight priority levels
1. Select the Priority column
2. Go to Home > Conditional Formatting > Highlight Cells Rules > Text that Contains
Apply these formats:
• High - Light red fill with dark red text
• Medium - Yellow fill with dark yellow text
• Low - Custom format with blue font and light blue fill
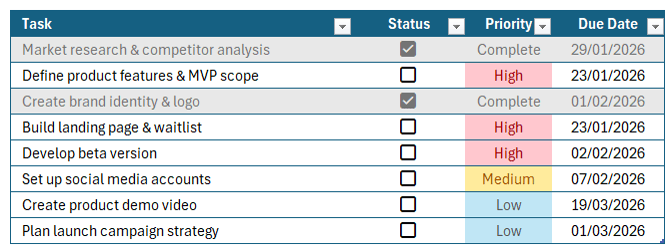
Fade completed tasks
To de-emphasise completed work:
1. Select the entire table excluding
the headers
2. Go to Home > Conditional Formatting > New Rule
3.
Choose Use a formula to determine which cells to format
4. Enter this formula: =$C6
Apply formatting:
• Grey fill
• Grey font
Completed tasks now fade into the background while active tasks stand out.
Step 4: Track Progress Automatically
At this point, the checklist already:
• Updates priorities automatically
• Highlights urgent work
• Fades completed tasks
Now
let's add a progress tracker.
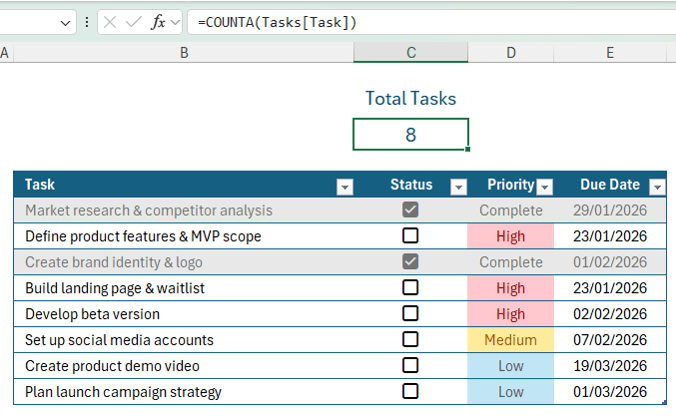
Count total tasks
• In Cell C2, enter: Total Tasks
• In Cell C3, enter: =COUNTA(Tasks[Task])
This counts all tasks and automatically updates if new ones are added:
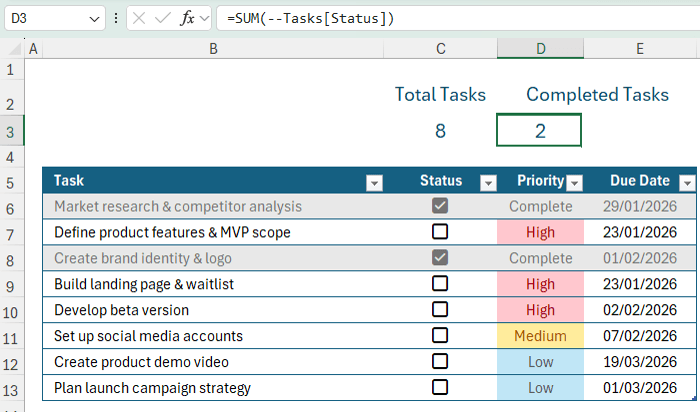
Count completed tasks
• In Cell D2, enter: Completed Tasks
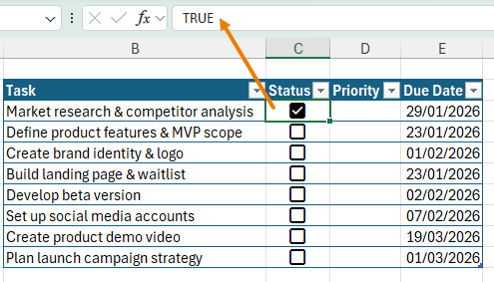
• In Cell D3, enter: =SUM(--Tasks[Status])
Why this works:
• TRUE equals 1, FALSE equals 0
• The double unary (--) converts TRUE/FALSE into numbers
• SUM adds up completed tasks instantly
Calculate percentage complete & add a progress bar
In Cell E3, enter: =D3/C3
Format the cell as a percentage. Then:
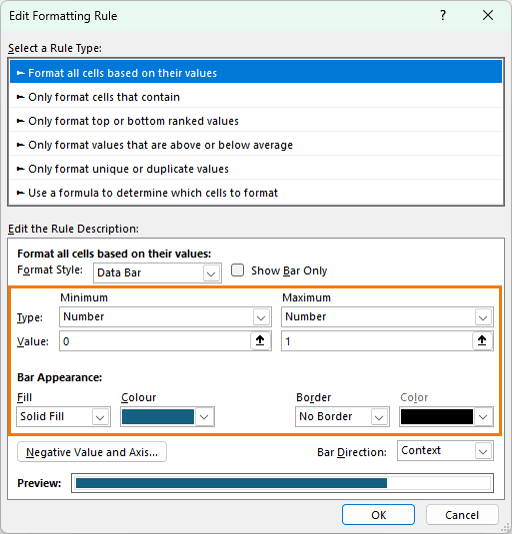
1. Select Cell E3
2. Go to Conditional Formatting > Data Bars
3. Open Manage Rules and edit the rule
Set:
• Minimum = 0
• Maximum = 1
• Bar colour to match your theme
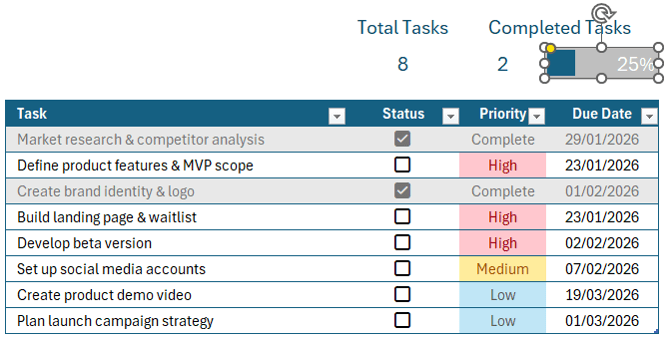
Optional finishing touches:
• Grey cell fill
• White font
• Add a rounded rectangle shape over the bar (hold Alt to snap to
grid)
Step 5: Final Polish
• Add a title such as Product Launch Checklist
• Insert a checklist icon and match its colour to your theme
• Add borders around the
summary metrics
• Align and space elements for clarity
Test the System
Try the following:
• Tick off a few tasks
• Change a due date to an earlier date
• Add a brand-new task
You'll see:
• Priorities update automatically
• Completed tasks fade
• The progress bar adjusts instantly
This approach is more reliable than manual tagging because:
• Dates don't lie
• Urgency updates
automatically
• Your checklist stays accurate with zero extra effort
Want to Go Further?
What you just built uses Excel Tables, formulas, and conditional
formatting; some of Excel's most powerful features.
If you want to master these skills properly, check out the Excel Expert course, where you'll learn:
✓ Advanced formulas and functions
✓ Conditional formatting mastery
✓ Excel Tables
✓ PivotTables
✓ And much more
All taught with real-world examples, not theory.
Have a great day,
Mynda Treacy
Co-founder My Online Training Hub
Did someone forward this email to you?
Want to sponsor our newsletters? Just reply to this email to get in touch with us.
Learn With Us
This email may contain affiliate links. This means I may earn a commission should you choose to make a purchase using my link. But we only promote courses we believe will benefit you.