Why Build a Database in Excel?
Most of us already use Excel for lists, reports, and analysis. But with a few smart tricks, Excel becomes more than just a spreadsheet: it turns into a structured database.
This setup works for all kinds of tasks:
- Client management
- Inventory tracking
- Expense tracking
- Employee information
- Project management
- …and more
The key is to build three components:
- A data entry form
- A structured database
- A little automation to tie them together
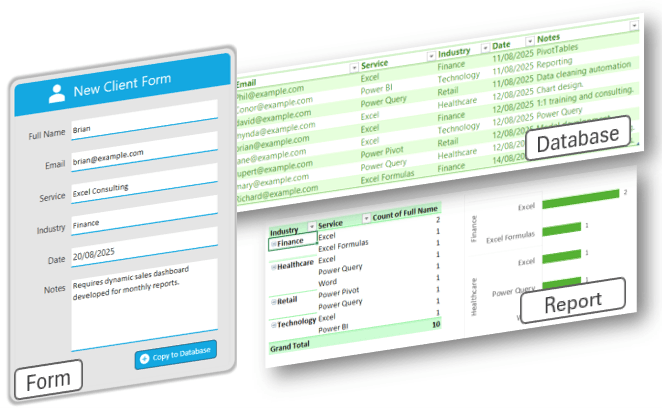
Step 1: Create the Client Form
We’ll start with a clean workbook and add a sheet called Client Form. This is where users will enter information.
Add the following
fields:
- Full Name
- Email
- Service
- Industry
- Date
- Notes
Some key touches to make the form easy to use (see the video for step by step instructions):
- Data validation: add a dropdown list for Industry (e.g. Education, Finance, Healthcare, Retail, Technology).
- Date field: use the TODAY function: =TODAY() so today’s date is automatically inserted.
- Formatting: use shapes like rounded rectangles, icons, and turn off gridlines to make it look like a real form.
- Unlocked cells: use worksheet protection to unprotect only the input cells so users can tab smoothly between fields.

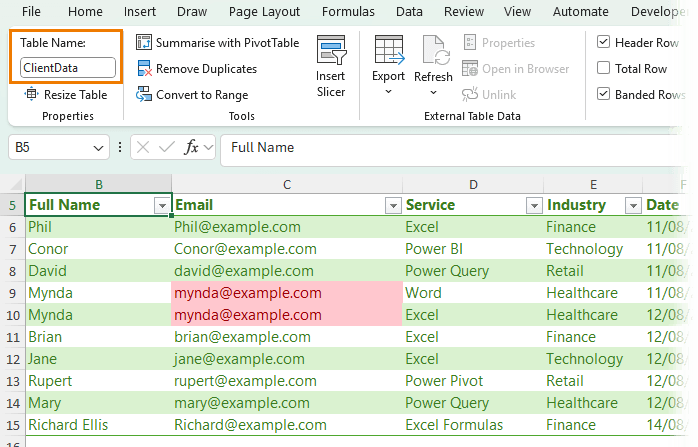
Step 2: Build the Database
Next, create another sheet called Database. This will store all client records.
- Add column
headers: Full Name, Email, Service, Industry, Date, Notes.
- Convert the range into an Excel Table (Insert > Table) and name it ClientData.
- Format the Date column as Short Date (Home > Number Formats).
- Apply Conditional
Formatting to highlight duplicate emails (since duplicates can creep in).
For extra protection, add a warning banner with this formula in cell B3:
=IF(B6="","",
IF(COUNTA(UNIQUE(ClientData[Email]))<>COUNTA(ClientData[Email]),
"⚠️ Duplicate Customers Exist",""))
Then apply red fill + white text conditional formatting to make the
warning stand out.

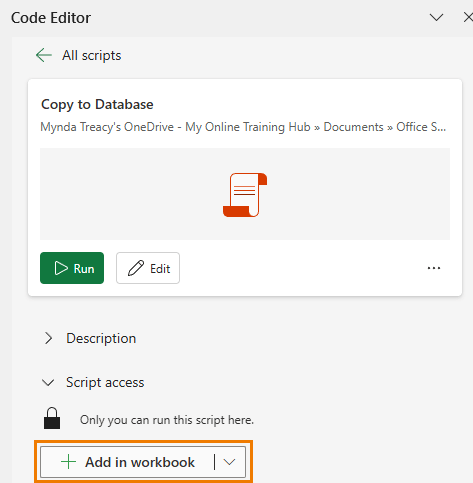
Step 3: Automate Data Entry with Office Scripts
Here’s the magic. Instead of manually copying form data into the database, we’ll automate it.
Note: I’ll be using Office Scripts so the file can be used in Excel Online or Excel for the Desktop, but you can also use VBA/Macros if you don’t need to use the file in Excel Online.
1. Go to Automate > Record Actions and record yourself copying the form fields to the database.

2. Stop the recording and edit the script (see video for step by step).
We need to adjust it so that:
- If the first row of the table is empty, it pastes data there.
- Otherwise, it adds a new row and pastes into the last row.
- After saving, it clears the form (except the Date field).
💡 Tip: I recorded part of the script, then used ChatGPT
to rewrite and optimize it. This saved time because I didn’t have to write out all the sheet names and cell references manually.
Finally, add a button to the form using the ‘+ Add in workbook’ button in the Code Editor to run the script with one click.
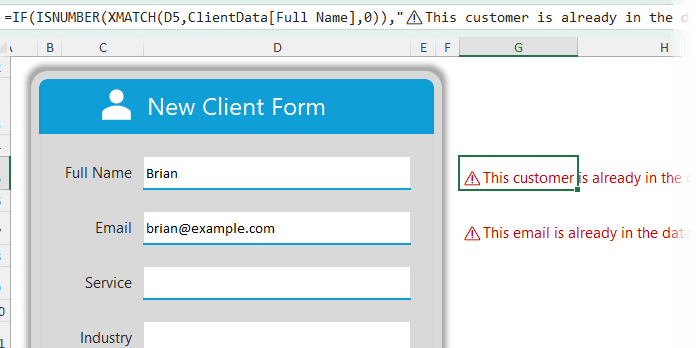
Step 4: Add Duplicate Checks in the Form
It’s great that the database warns us about duplicates -
but even better if the form does too.
You can use XMATCH to check if a client already exists:
=IF(ISNUMBER(XMATCH(D5,ClientData[Full Name],0)),
"⚠️ This customer is
already in the database.","")
Copy and adapt this formula for the Email field too.
Format the text in red so it’s impossible to miss.
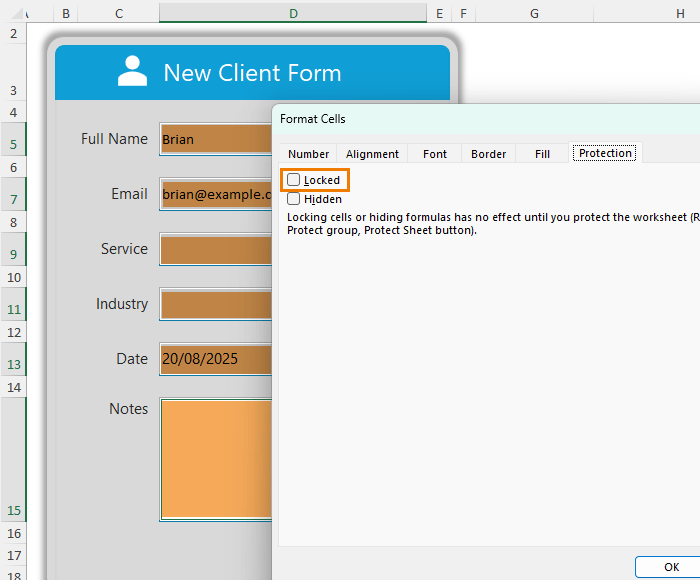
Step 5: Protect the Form
Before sharing with users, protect the form so only the input fields can be edited.
- Select the input cells → Ctrl+1 → Protection tab → Uncheck Locked.
- Go to Review > Protect Sheet, tick Select unlocked cells, and apply protection.
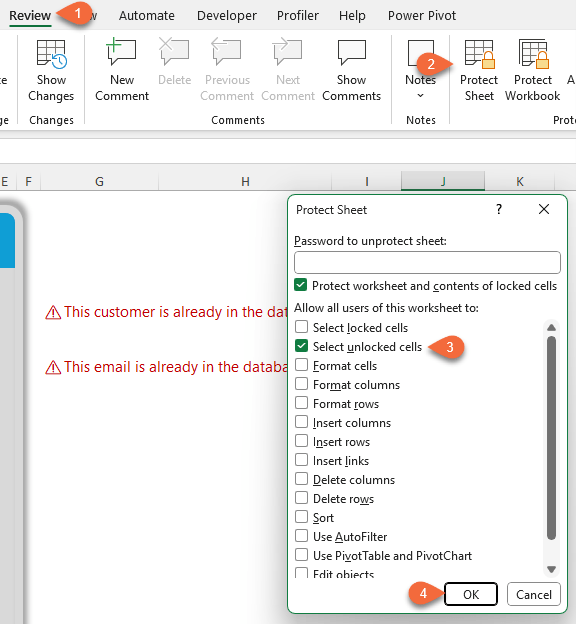
Now users can only enter data where intended - and pressing Enter or Tab (desktop only) jumps to the next input cell.
This works in both Excel Desktop and Excel
Online (with a slightly different setup for Excel Online under Review > Manage Protection) – see video for detailed step by step instructions.
Step 6: Analyze Your Data
With your ClientData table, you can now:
- Filter and sort records instantly
- Build PivotTables and charts for insights
- Create automated reports linked to the database
This
transforms a simple Excel file into a lightweight Excel CRM system.
Recap: What We Built
✅ A clean, user-friendly Client Form
✅ One-click automation to save and clear entries
✅ A structured, filterable Client Database
✅ Built-in duplicate detection
✅ Sheet protection for smooth data entry
✅ Ready for analysis with PivotTables and charts
This isn’t any
old spreadsheet - it’s a scalable system you can adapt to manage clients, projects, inventory, or any other information you need to track.
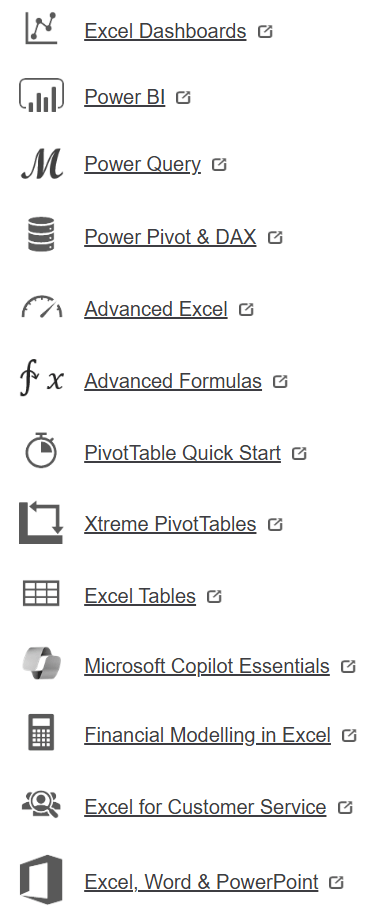
Take Your Skills Further
If you’re excited about building smart, automated spreadsheets like this, you’ll love my Excel Expert course.
It’s designed to take you beyond the basics and into pro-level Excel. with step-by-step lessons,
real-world examples, and downloadable workbooks so you can follow along.
👉 Check out the Excel Expert course here